BecomeSingers is reader-supported. When you buy through links on our site, we may earn an affiliate commission. Learn More
There’s nothing more frustrating than getting ready and excited to use your brand-new microphone only to find out that you can barely hear yourself. Sometimes, your microphone would be operating flawlessly until you hear someone shout “WHAT??” from the other side of the screen or stage.
There are only a few potential causes for this. Whether it is a persistent problem or an unexpected one, we have the causes and their fixes right here for you today.

Today, we’ll look at 7 major causes of audio issues with your microphone, specifically low volume issues. You might randomly experience this when recording music, making Zoom calls, or even playing online games with your friends. Whatever the cause, dealing with it is usually a tedious and frustrating experience.
One of the most common reasons your microphone is quiet is probably because of the low volume settings in your PC or Mac’s sound settings.
Plenty of condenser microphones come with their own volume knob, so many assume that solely using its built-in volume knob is more than sufficient to control your microphone’s volume level. So they simply turn the knob all the way up and neglect to check the sound settings in your computer’s preferences. However, this problem is easy to fix.
Open your sound settings on either a Mac or Windows computer, select the “input” or “recording” tab, locate your microphone, click on it, and increase the output volume level. Really simple!
But occasionally, things become more complicated than simply volume problems. So let’s look at the primary causes of this -slightly annoying- microphone issue.
Read More: 7 Best Microphones under 50
Table of Contents
Reasons why your Mic is Quiet
There are a few reasons your mic is quiet and not being pushed to give you loud volume. We’ll go over the most common causes and, hopefully, resolve your problem.
The first setting you need to check out is:
Volume Control (either on your microphone, computer, or speakers.)
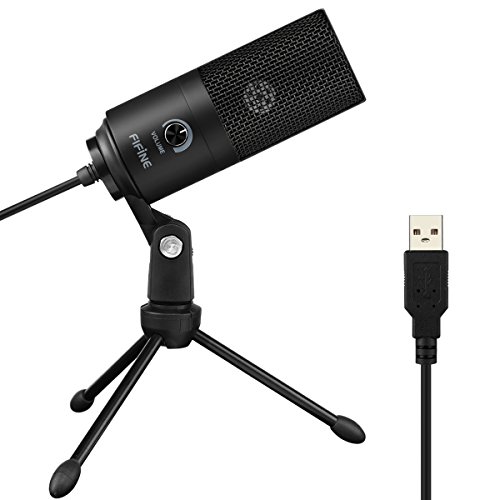
While it may seem like an easy fix, many USB condenser microphones on the market, such as the Fifine K669 USB microphone, have a volume knob on the microphone itself. Therefore, make sure the volume level is cranked up because we frequently end up messing with the volume knob unintentionally as a result of a simple hand motion or a microphone tumble.
![]()
If the volume is turned up, but your mic is still quiet, the issue could be from your computer’s sound settings.
Also, check if your speakers are turned on, and the volume knob is turned up (in case they have one.)
Low Power Supply
While some microphones need an external power source to operate correctly, others do not. Passive microphones do not often need external power, but all active microphones do.
Microphones with built-in preamps, FET/JFETs, vacuum tubes, externally polarized capsules, or A/D converters are active since these devices require power. Microphones without these internal components are passive.
And since all condenser microphones are active, they all require power, while dynamic microphones don’t since most are passive.
So if you have a condenser microphone, you will need extra power to boost it.
Faulty/damaged mic or cable
You may have received a microphone with a damaged diaphragm, or your microphone may have taken a significant hit, causing the diaphragm to break. If this is the case, you won’t be able to hear the sound properly.
If the mic’s diaphragm is malfunctioning or not responding quickly enough to the audio source, the mic will buzz or hum as a result.
In some cases, the microphone is perfectly fine, but the cable connecting your microphone to your device is damaged, also giving the mic a buzzing sound, distorted sound, or no sound at all.
Input Port issues
Sometimes the USB input port is the problem rather than the microphone itself. It’s possible that even if your computer recognizes the microphone through that USB input port, it’s still malfunctioning.
You can still experience the same problem even if you’re using a USB hub. If you plug your USB hub into the same potentially damaged input port, you will face the same issue.
No compatibility between mic and computer
Maybe you’re a PC user who purchased a mic that’s only compatible with Mac, or vice versa. There’s also a possibility that you’re using the right operating system but the wrong software. So make sure you check your microphone’s specs before buying it.
Sound card drivers need updating
If you’re still having volume issues with your microphone, it’s possible that your sound card drivers are out of date or even missing. So you want to make sure your drivers are up to date and working properly by checking them in your device manager.
Microphone privacy settings
There’s a chance that your microphone doesn’t have access or permission to be used properly, due to privacy settings. You will need to check your microphone settings and allow apps to access it.
7 ways to fix the Mic volume [Solved]
Since we covered almost all the possibilities of why your microphone could malfunction and give you low volume, let’s check out how we can solve these issues.

1. Adjust volume control
If the volume knob on your microphone is turned up, but you’re still having problems, it’s possible that your computer’s audio settings are to blame.
If you’re a Windows user, click on the “speaker” icon in the bottom right of your desktop, and make sure your volume is turned up. If you’re still having issues:
- Open your “control panel,” then click on “sound” or “hardware and sound” (depending on which version of Windows you’re using),
- Click on the “playback” tab, select your chosen speakers, and click on properties.
- Click on the “levels” tab and make sure the volume is turned up.
- Another thing to try is to click on the “Recording” tab. You should be able to see your microphone.
- Double click on it, and go to the “levels” tab. You will then see a volume slider that ranges from 0 to 100. Make sure you slide it all the way up to 100 to get maximum volume for your mic.
- Some microphones will have a “mic boost” slider under the volume slider. Make sure it’s also turned up to boost your microphone’s volume. However, not all microphones support this feature, and you may not see the “microphone booster” at all.
If you’re a Mac user:
- Select the “headphone” icon in the menu bar, and make sure you turn the volume up.
- If you’re still having issues, click on the “Settings” icon, then click on “sound.”
- Click on the “output” tab and make sure the “output volume” is turned up.
2. Apply external power to a low power supply
If you need to boost your condenser microphone, you can purchase external power sources, such as a phantom power supply or a DC bias voltage supply.
Phantom power is the most popular way of powering professional studio microphones. Every modern mic preamp supplies phantom power (audio interfaces, mixing consoles, etc.) A phantom power supply will usually deliver 48V of phantom power to your condenser microphone in a very compact housing. (You need to make sure that the full 48V is supplied to your mic.)
Another way of supplying external power is to use a DC bias voltage supply that typically ranges somewhere between 1.5 and 9.5V that powers electronic circuitry located inside a condenser microphone capsule. Unlike phantom power supplies, bias voltage doesn’t need a balanced audio line to work.
DC bias is perhaps the most common method of powering all microphones that aren’t studio mics, but rather average mics found in cell phones, laptops, etc.
Also Read: Do Dynamic Microphones Need Phantom Power?
3. Fixing a faulty/damaged mic or cable
If the problem is from your microphone’s diaphragm, you will need to either get it fixed or buy a new microphone.
If you believe the cable is the cause of the issues, you can try moving it around until you get your desired sound. That is, however, a temporary fix to the problem, and you will need to purchase a new cable in the future.
You might want to check out or update the connecting software system if your mic is wireless. And make sure there are the least amount of objects or interferences between your microphone and your device.
4. Fix input port issues
This step consists of a process called “troubleshooting the USB port.”
It might sound complicated, but it is actually pretty simple to do.
All you have to do is try plugging your microphone into another USB input port to ensure that it is the port that is faulty, not your microphone. If it works, then the problem is the port. If the device remains undetected, you have a faulty microphone. In many cases, that input port could be damaged, and switching to another port could solve the problem.
5. Fix compatibility issues between microphone and computer
Make sure the software of the microphone is compatible with the operating system you’ll be using before you purchase it, Mac, Windows, or both.
You might experience issues with your current operating system as well. On Windows 7, your microphone might work just fine, but on Windows 10, it could malfunction.
To solve this issue, ensure that your device’s drivers are up to date, make your microphone the default recording device, and always keep your operating system updated.
To make sure your microphone is the default recording device:
- Open your “control panel”, then click on “sound” or “hardware and sound”
- Click on “change system sounds.”
- Click on the “recording” tab and find your microphone.
- Right-click your mic then click on “‘Set as Default Communication Device.”
If your mic is already the default communication device and is still quiet, then you should check the next solution.
6. Updating sound card drivers
If you’re using Windows 10 and need to update your sound card drivers, all you have to do is:
- Type “device manager” in the search bar and click on it.
- Look for the section called “audio inputs and outputs” and double-click on it to expand it.
- A short list of devices will appear where you should see the microphone you want to update.
- Double click on its name to open up the properties window. And go to the “driver” tab.
- Find where it says “update driver” and click on it. Then search automatically for drivers. Your computer will now find the drivers and update them automatically.
- If your driver is already updated, then the “update driver” section will be grayed out, and nothing will happen if you click on it.
If you’re a Mac user, the process is a bit simpler:
All you have to do is go to the Apple website and download the latest driver for your model of Mac. Remember that after updating your driver, you might need to restart your computer for the driver to work properly.
7. Fixing microphone privacy settings
To be able to properly use your microphone with apps on your computer, you’ll need to check your app permissions in your microphone settings. To do that:
- Go to your settings and click on “privacy.”
- On the left, under “app permissions,” click on “microphone.”
- Click on “change” and make sure “microphone access for this device” is turned on.
- Then, again, under “microphone,” turn on “allow apps to access your microphone.”
Your microphone should now have full access.
Also Read: Types of Microphones for Singers and Musicians
Conclusion
Setting up your microphone for your podcast, YouTube channel, gaming with your friends, etc., should be a stress-free and exciting experience. We know that dealing with a quiet microphone is extremely frustrating, especially when you have no clue why it’s happening. However, we hope we were able to assist you today in finding the issue.
If you have tried all of our suggestions without success, you might have received a damaged product. And buying a new microphone will simply solve your volume issues.


