BecomeSingers is reader-supported. When you buy through links on our site, we may earn an affiliate commission. Learn More
You may feel astounded and overwhelmed by the flair of versatility and dexterity of the hands of the DJ when he entertains the crowd. And you mutter to yourself: “What he does puts a spell on the undulating crowd.” He seems to hypnotize the crowd to sway and vibrate to the beat and rhythm that he is creating. “How does he do it?” you ask yourself. Well, he does it, of course, using a DJ controller. But what is a DJ controller?
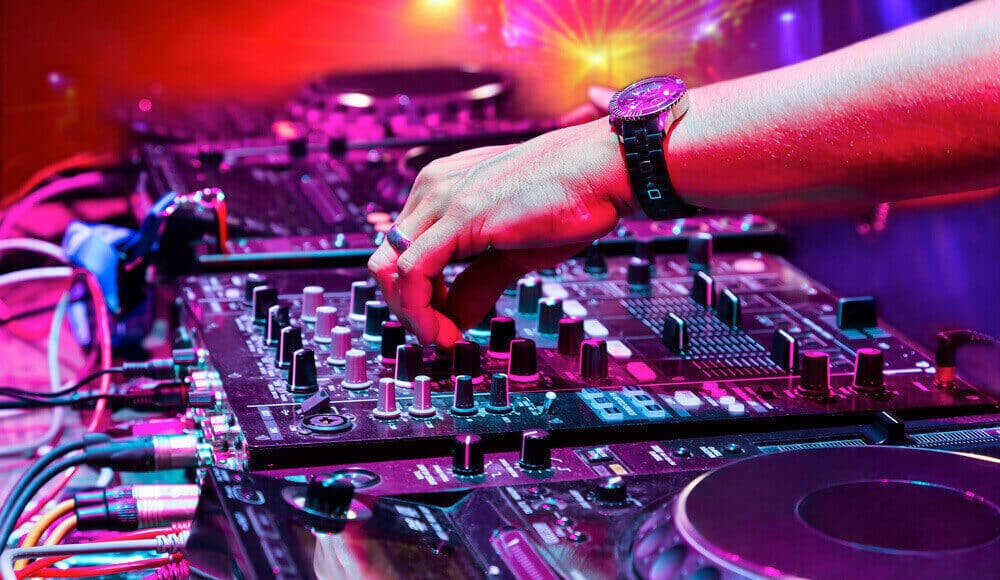
The classic DJ setup is that of two CDjs along with a Dj mixers. Yet, this classic setup has been quickly replaced by DJ controllers. DJ controllers, of course, are designed to enable DJ to mix audio files via the use of knobs, software, backlit buttons, jog wheels, touch strips, and many other features. It is perfectly designed to mimic the feel of the classic setup.
Table of Contents
DJ Controller’s Essential Features
The DJ controllers come with a DJ software to enable DJ to mix music. It also features parts like those of faders, knobs, encoders, jog wheels, backlit buttons, touch strips, and many other parts. Despite these different parts, it does need a DJ mixer to be able to mix various audio signals.
Thus, it makes use of a mixing software (dj mixers) to which it sends various audio signals. This software is located in a computer. You will often see DJs with laptop near them while they engage in deejaying. Moreover, many DJ controllers are equipped with soundcards that feature a maximum of 4-channel outputs and four of stereo.
Now there are many Standalone All-in-One DJ Controllers available in the market that do not require any laptop to operate them.
With this feature, a DJ can figure out the music quality using his Dj headphones before playing it on the main output. The DJ controller makes use of MIDI or HD protocol in communicating with the computer via the USB port.
The contemporary DJ controllers mimic the classic setup. Yet, they do more by simplifying everything for the DJ. These DJ controllers can maximize the use of computer software. DJs, for example, can store various cue points relative to his audio files. With the use of a DJ controller, DJs can reconfigure the different controller parts to expand the functionalities of these parts beyond the manufacturer’s intended functions.
The DJ controllers, as said earlier, come with different buttons for playing various sound effects. Yet, with the DJ software, you can customize each button for a particular effect. You can also customize the looping features on both your controller and software.
The location of the looping features depends on the controller you are using. You can set up your loops in 4/8,16 sets or more. With the use of FX station and DJ software, you can easily learn the process of using sound FX and loops.
Buttons, and Control Knobs Parts of DJ Mixer
Knowing the essential features of a DJ controller, your next job is to learn its different parts, buttons, and control knobs. Here is a list and a short description of each part of the DJ controller:
Tempo Fader
You will find a tempo fader in any DJ controller. It can change the recording playing. Thus, with the help of it, you can speed up a song by simply sliding it up to the direction of the positive sign. The reverse would be good for slowing down your song.
When a DJ play a song, he usually progressively changes the speed of the song 4 or 5 BPMs. This helps him transition to the next track. This is a trick that DJs use to let them transition to the next track with 8 to 10 BPMs without diminishing the song’s quality.
FX Section Control
The FX section is a staple feature of the DJ controller. It helps DJ controller to execute well using the DJ software. Some DJ controllers, however, are not equipped with sound FX. The FX engine has two sections. The first section consists of speed, mode, swing, and multiplier controls. The other one is the parameter group, which usually includes FX timing and wait controls.
Sync Button
You can use the Sync button to immediately meet another track’s DPM. Most DJ controllers are equipped with this feature. Its main function is to match the BPM of one track with another track. This is a quicker way to match new track instead of using that of the tempo slider. Thus, you can match the tempo of two decks using the sync button. Yet, you should be very careful when pressing it while the song plays. This is because it may create a worse sound than if you are just using the tempo fader knobs or the slip mode.
Sampler Buttons
Every controller comes with these buttons. Each sampler button comes with present functions. You can utilize the pads for playing a short sound FX if you will press the sampler button. The sampler buttons are generally velocity-sensitive. The trick is, you should enable the buttons to cease playing while you remove your hand from the pad. You can also attempt while playing with your samples to scratch DJ’s.
Moreover, when you press each button, you can also make use of software for adjusting things. This process is called MIDI mapping. This process is usually done by moving to your software settings, and then, pressing some buttons. You can do this to change the drum pads’ functions.
Check this buying guide to know more about Best MIDI Pad Conrollers
Platter
The DJ controller features the platter. This platter has two modes. They are the vinyl turntable and slip modes. You can regulate the track playing’s speed if the platter is in the slip mode. There is one more option called dj controllers motorized platters. On the other hand, you can use the platter as a vinyl turntable once the platter is on the vinyl mode.
You can fast-reverse or fast-forwards the records once you hold “shift” while rotating the top while playing the records. Moreover, you can use the tempo faders and customize them to configure how fast the tempo change should be when running down or up.
Drum Pads
The DJ controller’s drum pads is a multi-function one. You can use it for triggering various loops preset and cue points via the software. Some controllers, however, are equipped with pads that can generate FX and one-shot samples. You can locate the pads on the side or above the jog wheel on several types of controllers.
Shift Buttons
The shift button is more often a large button. It functions like the shift key on your computer. You can use it to utilize the second feature or function of a specific button.
Play/Pause Buttons
The function of these buttons is easy to understand. You can start or stop your track on its present position within the song if you press this button. You will frequently use these buttons when you use the DJ controller. Moreover, you will find these buttons among or within the sampler drum pads. Yet, if it is not situated among the pads, you will readily see it because it is very visible.
Cue Buttons
You will find the cue buttons in two specific locations. Each button carries varied purposes. One cue button can be used to change the track’s start location, while you can use the other button to gain control of the deck on which you want to play with your Dj headphones. Yet, you can use both for rehearsing or configuring your transition to the next song.
You will see the big cue buttons within the sampler drum pads. You can press these buttons if you want to change the location of the start of a certain song. So, when you push them down, you can enable the song to play continuously until you release them. Moreover, you will more often find multiple cue buttons spread on your controller.
Low EQ Knobs
You can use the EQ knobs to control the volume of low frequencies in your audio track like kicks and bass. You can use the master volume of volume faders knobs to control all the EQ knobs simultaneously.
EQ Faders
One of the most essential parts of the DJ controller is the EQ faders. Each channel usually has 3 various knobs. These knobs are the high, mid, and the low. You can use the treble knobs for controlling the highest audio frequencies. You can use the mid, on the other hand, for the mid frequencies like those of the vocals. You can use the third knob for the lower frequencies.
Isolator EQ
Just like the EQ faders knobs, the isolator EQ also comes with a low, mid, and high knob for every channel. The function of this equalizer knob is to boost or cut each frequency greatly. It allows the DJs to immediately mute some sections of tracks when mixing music. This makes the muting process sound very subtle.
Crossfader
You can use the crossfader to gain control of the channel you are working on. You can find the crossfader near channel two. This implies that you will mostly hear on the PA system in the two channels. Yet, you can still hear the one channel faintly. This depends, however, on what and how you set up the crossfader settings.
As you get the hang of scratching, you will definitely level up to different crossfader settings. Yet, as a starter, you better content yourself with the basic functions. You will, of course, frequently use the smooth crossfader function to blend two tracks gradually.
As you advance in learning, you will learn to utilize the quick-cut crossfader feature to allow you to quickly make the crossfader’s back and forth movement to make you carry on with your different scratching techniques. This quick-cut feature will be so much invaluable as you begin to level up in your scratching techniques.
Jog Wheel
The very core of every controller is the jog wheel. Its design is patterned after the vinyl record. You can try touching the jog wheel’s top to stop the track. You can also spin it to let you scratch. Yet, when you touch the jog wheel’s side, the track will not stop. But if you move it, you can slightly speed up or slow down the track tempo so that you can line the beats up of both tracks.
Jog Wheel Tension Adjust
You will not commonly find this feature most controllers. Yet, you will find it in topnotch gears. This feature lets you adjust the resistance of the bearing of the jog wheel. You can set it up to configure how you would want the jog wheel bearing to be adjusted. If you set it to the lightest setting, the wheel will go on moving when spun for many seconds. While if you set it to the heaviest setting, it will quickly stop.
Deck Select
You will find in each deck a set of controls. You can toggle this set of control to gain control of one of the decks simultaneously. Thus, you can use the deck select to switch to another track while playing one by loading another track. The first one, of course, will go on playing, letting you play a maximum of four decks at the same time.
Playback Modes
There are basically two playback modes, and you can set these two modes by using the playback modes feature. The two playback modes are the slip reverse and the slip. You can use the slip mode to engage in scratching a track, and then, making it return to where it should be when you release it. Thus, the track keeps on playing in the background. Slip reverse, on the other hand, will let you play backwards a track, but it will revert to where it should be if you haven’t activated it. You can use the slip reverse for cool effects.
Loop Control
The loop controls are two round buttons for setting each endpoint when making a loop. After you’ve activated the endpoints, the loop length is then set to half or double. The loop control also has a rectangle button for automatically making a 4-beat loop if you haven’t made a loop. But if there is already a loop, then the four-beat loop will automatically deactivate.
Volume Faders
There are four volume faders for each channel. These controls function as level reduction faders. If you let the fader open, the channel will play relative to its original volume. Yet, as you move it down, the channel will also become quieter.
Tempo Controls
If you want to playback a track’s pitch or speed, you can use the tempo controls. You should remember, however, that you can’t beat-match two tracks that come with varied BPM. Hence, you need to adjust the tracks’ tempo manually to make them sound alike so that you can beat them.
Browse Controls
You can use the browse controls when selecting from your library a track and afterward loading it onto a deck. It is basically what its name is, for it allows you to browse and control whatever you have selected.
Encoder
As an assortment of hardware and software, the audio encoder is utilized for converting analog signals into digital files that result in many file formats. The AUP format is the standard output of such software utilized in an encoder. You can also edit its structure.
Beat FX Control
You can use these controls for echo, flanger, and other sound FX. You can switch between sound FX (14 FX). You can also use these controls to alter the length of each effect. Moreover, you can use it to intensify the effects.
Play Control
You can use these buttons for playing or pausing the track. Aside from that, you can use it for cueing points.
Conclusion
Having familiarized yourself with the different features of the DJ controller, you can now begin your deejaying career. You can start tinkering with these different features to get the hang of the use of each of them. In this way, you can become dexterous enough with their use. Soon, you will become a versatile and flexible DJ, that is looked upon by aspiring DJs and crowds. Practice, of course, enables you to hone your skills and perfect them, turning your deejaying skills into an art.


