BecomeSingers is reader-supported. When you buy through links on our site, we may earn an affiliate commission. Learn More
Miking a guitar amp is frustrating when starting out: you just can’t get the tone you want. Even when your amp is perfectly dialed in, the mic’s recording just seems like a mess. But don’t worry; this is quite easily fixable once you know what you’re doing.
I’ve compiled a step-by-step guide to miking your guitar amp, with pro tips and 8 common mistakes to avoid along the way. From choosing the right mic to angling it the ideal way, here’s everything you need to know.
Table of Contents
How Do You Quickly Mic a Guitar Amp?
You can quickly mic a guitar amp using the close-miking method. Place a dynamic microphone, like a Shure SM57, a few inches parallel from the amp’s speaker cone for a direct sound. Connect the microphone to a preamp or audio interface and adjust gain settings until you get a clean signal with no noise.
This will get you started on recording a near-professional sound almost instantly. But if you’ve ever seen real producers work with guitar amps, you’ll realize that there’s a lot more to it.
Guitar amps can be miked in dozens of ways, and slight shifts in angle and distance can create significant differences in the sound. And when using a number of mics, phase issues are a common problem.
So keep reading to discover how you can mic your guitar amp, step by step, and the mistakes you need to avoid to get the best sound possible.
Miking a Guitar Amp: A Step-by-step Process
Step 1: Choose your microphone
Picking the right microphone for miking a guitar amp is key. Dynamic microphones like the Shure SM57 are industry-standard. They’re the best for recording guitar amps because they can handle high sound pressure levels with clarity and precision.
In addition to dynamic mics and condenser mics also work well for recording guitar amps. These tend to be more sensitive and are great for capturing the details of an amp’s sound.
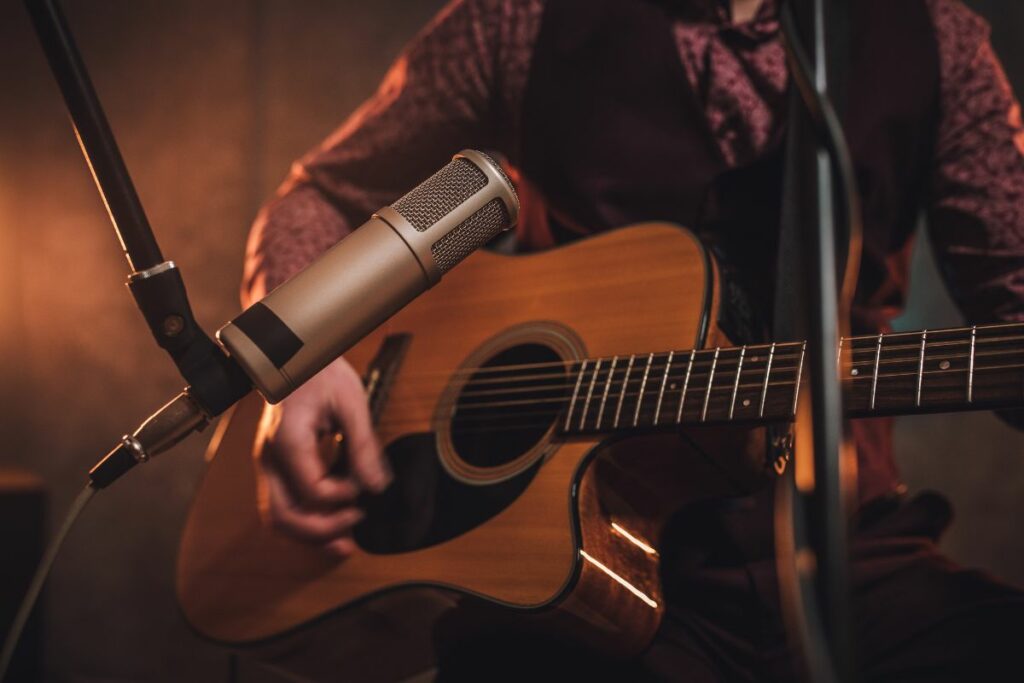
If you’re recording a guitar solo or anything else that’s especially lead-oriented, these mics will deliver much more detail than their dynamic counterparts. When recording electro-acoustic guitars, condenser mics are particularly good at getting the finer nuances of your playing.
You can even combine multiple mics to mix them and get the exact sound you want. The main thing to be wary of is phase issues, which I discuss in the section “mistakes to avoid”.
Step 2: Position the microphone
Identify the speaker cone
The position of the microphone plays the most important role in capturing the desired sound. First, you need to know exactly where your speaker cone is located. This can be a bit troublesome on some amps that have a thick grill.
So, for that, I recommend using a flashlight on your phone to peer through the cloth and check for the edges of the speaker, as well as a bulged part in the center. You can gently touch the grill and feel it to get an idea of how the speaker is located.
Try close-miking first
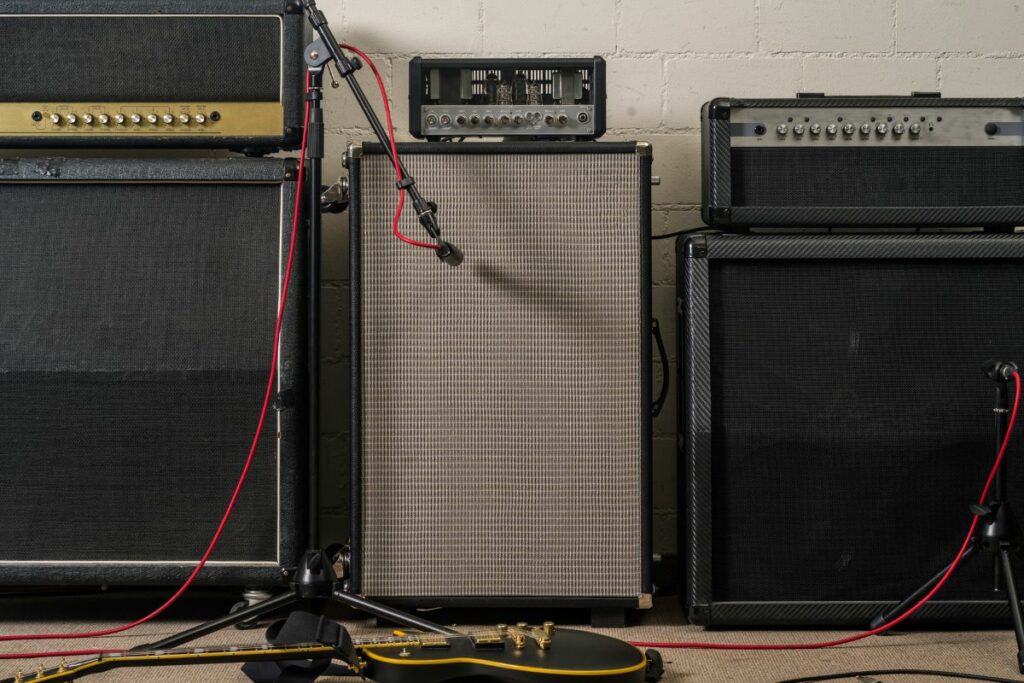
The most common way to mic an amp is close-miking, which is simple and beginner-friendly. When close-miking a guitar amp, position the microphone very close (about an inch) to the speaker cone, parallel, and facing the center of the speaker.
Then, you can experiment with moving the microphone slightly off-center or pivoting it closer to the edge of the speaker cone to attain a different tone. Minor adjustments can make major differences to the sound, so be sure to note how you’re moving it around.
You can use a piece of tape to mark the position on the floor, as well as a small one on the amp grill to know where you’re placing the mic. This way, you can always return to your favorite positions.
Positioning the mic has three components: distance, height, and angle. Here’s a basic rundown of how they affect the sound on most amps. Note that this can vary based on amp design.
- Distance: When a mic is close to the amp, it’ll pick up more bass, and give a full-bodied sound. Moving it farther will enhance the treble, and give a ‘full picture’ of the amp sound, but slightly less present and a bit thinner.
- Height: When the mic is close to the center of the speaker, it will have rich treble, and as you move toward the edge of the speaker, there will be more bass. A sweet spot is generally in between these, in the mid-range area. You can also move the mic horizontally instead of vertically.
- Angle: Generally, when the mic is pointing at the center of a speaker cone (known as ‘on axis’) it will pick up fewer high frequencies and more midrange. Pointing the mic off-axis will produce less bass, but increase the presence of higher-frequency sounds.
Step 3: Connect and Adjust the Preamp
Connect the mic to an audio interface, mixer, or preamp using an XLR cable. Adjust the gain settings until you get a clean sound with no distortion. Gain controls can also affect the EQ of the signal, so pay attention to how the signal sounds as you adjust the gain.

You should use closed-back, flat-frequency headphones when adjusting the mic’s sound, as that’ll give you a much more accurate response.
It’s particularly important to make sure that there’s no ‘clipping’: when the signal goes above 0 dB, and the interface is unable to handle the red-hot signal. Most devices have an indicator, so ensure it’s not flashing red.
Step 4: Test by Recording and Monitoring
Once you have the microphone positioned correctly and connected to the preamp, it’s time to do a trial run. Record and monitor your sound while playing. Keep track of the input levels to ensure they’re not too high, which can cause unnecessary distortion.
You can experiment with adding effects, compression, and EQ to refine the sound, but don’t worry too much because these can be added in post-processing.
The goal here is to adjust the mic position, gain, and your amp settings to get the best sound possible before the final recording. Remember, even if your amp’s tone is perfect, the mic will capture something slightly different.
So you have to compensate for that by using your ears and finding what works for you. This step can take a little while as you work through steps 2-3 again, and you might want to try multiple mics too.
Step 5: Record your final song!
Once everything is tested and ready, you just have to record your final take for your song! But before you do that, I’ll discuss some common mistakes to make sure you avoid them.
Mistakes to Avoid Making When Miking a Guitar Amp
Miking a guitar amp is tricky business, and even the slightest of mistakes can compromise the quality of your recordings. Here’s what you need to look out for:
Mistake #1: Placing the Mic Too Close or Too Far Away
Placing the microphone too close or too far from the guitar amp can affect the sound quality. When the microphone placement is too close, the sound becomes harsh and brittle. Conversely, when the microphone is too far away, the sound becomes hollow and lacks energy.
So as mentioned in close-miking, placing the microphone about an inch from the amp grill is recommended to capture a balanced sound. Then, experiment in small steps from there to find the ideal tone for you.
Mistake #2: Using the Wrong Microphone
While microphones like the Shure SM57 and Sennheiser E609 are popular choices, using the wrong microphone can result in poor-quality recordings. Using a microphone that’s not designed for miking guitar amps will lead to distorted sound or incomplete capture of harmonics.
While you can use mics from other brands, you need to understand all their specifics: sound pressure levels, frequency response, directionality, etc. This can get very technical, so it’s often best to stick to tried-and-tested choices.
Dynamic mics are good at capturing louder sounds, while condenser mics tend to work better with softer tones. Small-diaphragm condensers tend to be a good alternative choice for clean electric guitars and acoustics.
Mistake #3: Not Being Careful with Volume Levels
One of the most common mistakes guitarists make when miking amps is not being careful with their volume levels. If the amp is too loud, it can cause distortion which will ruin your recordings. On the other hand, with a quiet amp, you won’t capture the guitar’s tonal nuances.
To get the best recordings, you should be able to control the amp volume as well as the mic’s gain. This will allow you to adjust both levels until they are just right for the tone you’re trying to achieve. It can take some experimentation to find the ideal balance, so don’t give up!
Mistake #4: Ignoring the Room’s Acoustics
The acoustics of the room you’re recording in has a considerable impact on the sound of your recording. Ensure that you record your guitar in a room that’s acoustics-proofed and treated. There shouldn’t be reflections and reverb that would cause interference.
If there are too many hard surfaces in your recording space, it can lead to a muddy or distorted sound. Positioning the mic properly and using acoustic treatment when necessary can minimize these issues and get a much clearer recording.
Mistake #5: Not Monitoring Your Sound
A mistake many recording beginners make is not paying attention to the recording or monitoring the sound levels. Always monitor, record, and adjust the sound level to ensure you get it right and don’t end up with distorted or unwanted sounds.
You see, what you’re hearing in the room isn’t necessarily what you’ll hear in the recording. So you need to live-monitor the sound from the mic using high-quality headphones to really know what you’re dealing with. This’ll allow you to make compensations to get a much better tone.
Mistake #6: Not Checking for Phase Issues
When using multiple microphones to capture the sound of your guitar amp, you can easily run into phase issues. Mics placed at different distances and heights are prone to recording a different phase of the amp’s sound.
You can check for the phase in the testing stage by recording both mics in separate tracks and observing the peaks and dips. These should be aligned down to the millisecond. You’ll probably need to adjust the positioning of both mics a few times to get it right.
The trick here is to keep all positions symmetrical. Keep them at the same distance, or the same height, or keep them at 2x, 3x, or 4x the position of the other mic. For instance, if one mic is 1 inch away, keep the other mic 2 inches away.
Ensure you check for phase cancellation issues by comparing a mono mix to a double-mic mix to hear if any phasing issues have affected your track.
Mistake #7: Not Considering the Impedance Match
Many people don’t consider the impedance matching between their mics and audio interfaces/preamps. This can cause a huge loss of signal, resulting in weak recordings.
The impedance mismatch is caused when your mic has a higher output impedance than the input of your audio interface. To ensure an even signal, you should match these two impedances as close as possible.
You can find these values on the back of the devices, or on the spec sheet that comes in their boxes. You can even find more info online. This issue is common when using cheaper equipment that wasn’t designed for guitar amps.
Mistake #8: Ignoring Grounding Issues
Hum, buzz, and other noise issues in your recordings may arise from ground loops or poor grounding. Ensure you monitor any ground loops and ensure good grounding to eliminate any unwanted noise in your recording. Some devices have a ground lift switch for this.
Also, be sure to use high-quality cables between all of your equipment, as this will help ensure the signal remains clean and free from interference. Quality cables also help reduce the amount of unwanted noise in your recordings.
You can also opt to use clean power supplies and surge protectors for all-around better electrical performance of all of your recording equipment. Another way to reduce noise is by using an isolation transformer that will line-isolate devices from each other.
FAQs
What mic should I use for the guitar amp?
Can you just plug a mic into an amp?
How many mics do I need for a guitar amp?
Conclusion
Overall, miking a guitar amp is not too complex once you get the hang of it. Follow through these steps one by one, while re-checking the sound you’re getting, and you should be golden. Once you’re confident, you’ll be able to use multiple amps and mics together to create a more nuanced, polished sound, just like the pros do.
If you found this useful, share it with your friends, and feel free to check in with us!


